In addition to building the complex, somewhat permanent scenes that make up the village, I also like to do short one-off scenes that I may display for a short period of time. In some cases, I take them down as soon as I have photographed them. This page is going to feature a different small scene every month, and talk briefly about how it was done.

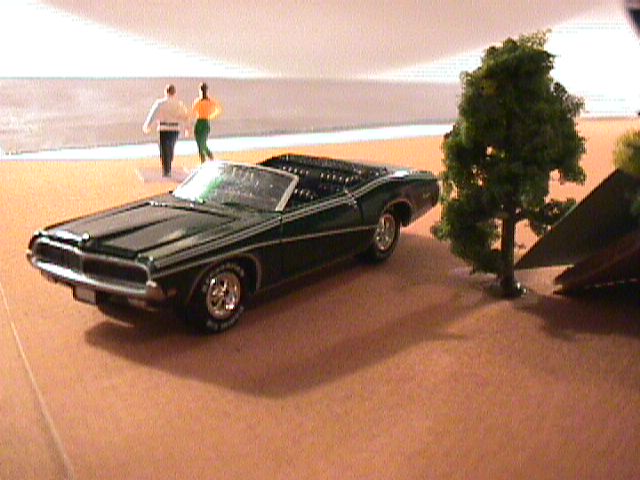
I was inspired to do the scene above by a car ad in a magazine from the sixties. When you first saw the pic above, did you think it was a photo of a real car and real people?
How It Was Done

The pic above shows the setup for the pic. The materials used are very simple; the "beach" is a sheet of tan art paper, the "water" is a small piece of aluminum foil with the dull side up, and the "sky" is a sheet of white paper with black magic marker streaks on the other side. The "shelter" is a piece of cardboard covered over with a sheet of green art paper. The tree is made by HEKI Model Railroad. There is some 'intercorporate' dating (gasp!) going on with the man and woman: the man is from Life-Like Model Railroad Scene-Master Set #1688 "People Walking," while the woman is from Atlas Model Railroad "HO Scale People" set. The car is a Johnny Lightning (1/64 Scale) model from their "Classic Gold Collection": it's the 1969 Mercury Cougar Convertible, #404-04.
As you can see from the diagram above, there were a number
of lights used to light this scene, but nothing particularly special. The
light on the left is a plain old incandescent desk lamp with a movable
shade, while the light on the right is a 150W halogen desk lamp with a
built in dimmer. The ambient light was provided by a halogen flashlight
aimed at the aluminum foil and the spot in front of the people. The whole
scene was lit from above with an ordinary overhead light fixture.
Why It Works
This scene works because of three important things:
Lighting: The biggest trick at work here is that the light is diffused by a piece of plain white paper. The paper filters the light onto the scene, at the same time creating the illusion of a firmament (sky) by giving the scene an apparent light source. (In this case, the sunset over the ocean, or maybe sunrise if this scene is on the Atlantic.) The ambient light causes a glare to be formed in a strategic location on the foil, making it look like a reflection of the sun. The clouds in the sky are made by a combination of black ink streaks on the other side of the paper (which is backlit), and a deliberate curve placed in the paper to create a shadow.1. Lighting
2. Perspective
3. Realism of the items in the scene.
Perspective: This is deliberately arranged to make everything look bigger than it really is. The car is at an angle so that it appears to extend into a greater distance than it really does. The most realistic items are placed close to the camera, but are in a darker area, thereby making it harder to make out the details that would give the scene away. (See HO Scale Village for a discussion about light level and realism.) The people are situated beyond the focal plane of the camera so that they are out of focus; this adds to the illusion that they are far away. Finally, the strip of foil used to simulate the water is cut at an angle away from the viewing point for the scene. This makes the beach seem to extend into the distance.
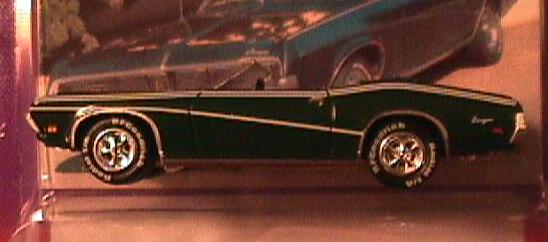
Realism: It plays a major role in this scene. The fact that the car is one of the most outstanding examples of die cast I have ever seen certainly helps. This model has realistic grille features, painted marker lights and taillights, real rubber tires with raised white lettering, and real chrome mag wheels made from Cragar's original designs. In addition, the windshield is surrounded by chrome, and the interior has a real grain to it. All of these things contribute to the realistic appearance of the car. The same thing can be said of the tree; HEKI is known for the realism of their trees and shrubs. The people, on the other hand, aren't so realistic; they are covered with shiny paint, and don't have much in the way of detail. That's why they are placed farthest away in the scene, so that the flaws can't be easily seen.


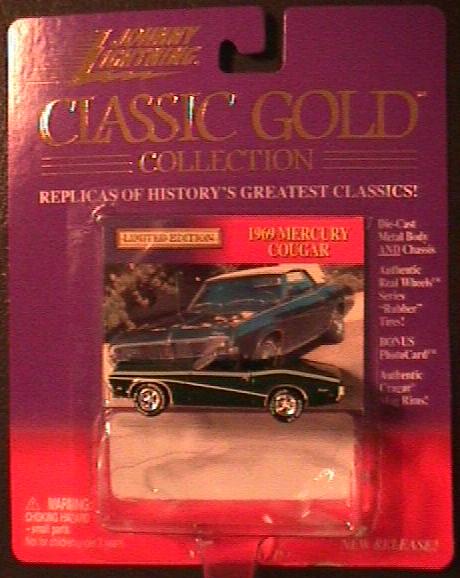
A pic of the Cougar with, but out of (GAK!!), its blister pack. (Yes I know, but it was the only way I could set up the scene I wanted. So, for you collecting purists out there, I don't mind if you throw tomatoes -- just take them out of the can first.)
The second pic is a close up of this extraordinary
model;
it even looks real sitting on its blister pack.![]()
Do you think you could set up a scene like this? Do you think you can photograph it? Do you think you could fool me into thinking it might be real? If you think you can do these things, why not give it a try? Send me a good pic of the scene, along with a photo of it from above that shows the details, plus a description of what you did, what you used and why it works, and I might feature it in "Scene of the Month".
Send your pics to [email protected] or just click here. Webmaster


 ©
2000