
|
|
| April 2000 Issue |
Developing a Village Scene from Start to Finish |
What's that in the Background?
Accessorize, Accessorize, Accessorize
Applying layering to our scene
Attracting attention to the action
Ok so now that we've discussed in detail the side issues of village
construction it's time, in the words of Ellery Channing, to stop
planning less and start doing more. So let's get to work on actually
building a village scene. What do we do first? Well the first
thing is to locate where the scene is going to go. I have already
done that it's going to go on a shelf in a bookcase 28" x 11".
The second thing if you haven't done it already is to measure the space.
( which I did as you can see). I'm not going to show it to you because there is
no point in wasting bandwidth and your time too look at an empty shelf.
At this point it's a good idea to stop and try to get an idea in your head of what the scene will be.
Ok so you've found a pic somewhere, or you have an idea in your head. A good next step is to
Of course if your village is the Dicken's Village then you don't have to set your period much
At this point you are ready to start putting your scene together. The next thing
Ok at this point you have a wide range of options depending on your
Take a look at the pic above. This is a background I
However we aren't going to use that bed we are going to create
I've decided that I'm going to use one of my other scenes
I then attach the three pics to the back of the bookshelf.
The pic above shows the shelf with the background in place
Before you can create the surface you have to decide
The next thing you want to do is begin to put in your
Put in all the accessories you can that belong in the
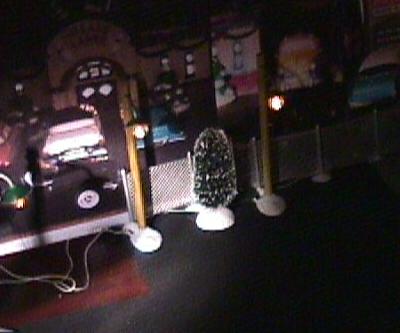
The cluster of trees also serves another purpose. As
Notice how the fence and trees hide the battery box
At this point we are ready to install our parking lot lights
At this point the scene is starting to come together.
We need to route the wires for the last two lights.
After the wires between the second and third lights have
Notice where I placed the second lights. One of the secrets of
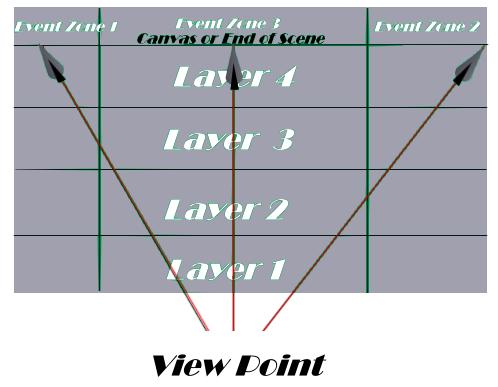
To understand layering look at the diagram below.
To understand this diagram think of looking down on the
Kinda tough to get huh?
For us Village Idiots, this is much easier. For us this is simply
First let's take a look at the layers. In a Village Scene that has a
Layer 3 is the "Transition Layer". If you imagine looking
Layer 2 is the "Main Interest Layer" in a painting this is "center stage" it should
Layer 1 is the "Foreground", this layer is used to create the illusion of
Now for the event zones. The event zones are the places where the action should
I placed the second two lights out in the middle of the scene and turned them
All stationary objects are now in our scene
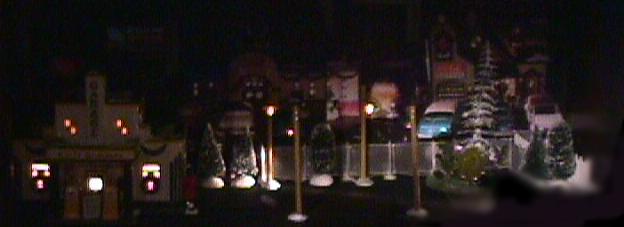
I took this pic from this unusual angle so that you can see the layers
Before we can decide what kind of action to put in our event zones
She would be sitting up on the back of her boyfriend's car as he was driving
Let's take a look the finished Zone 2
This is an excellent example of what I was talking about. Notice how everyone and
Also notice that you get the feeling that the two girls know each other and that
Over in Zone 1 this is going on...
This black firebird has just arrived and the owner and his girl have gotten out.
Having the figures standing near the doors of the car and looking out
Let's take a look at zone1 from a different angle.
It looks as though the owner of the Firebird has parked here and gotten out
Once again this scene is a scene unto itself within the larger scene.
Now let's take a look back in Layer 2 Zone 3
Here we have in the foreground (Layer 1) the Blue Camaro with the girl sitting
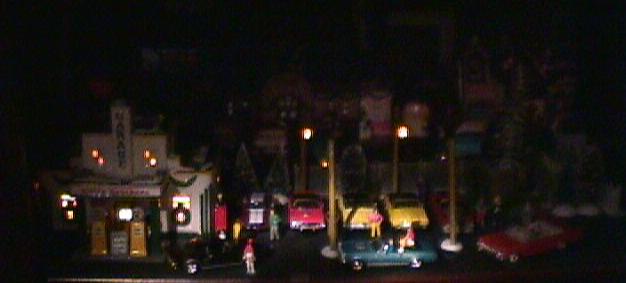
And there's the whole scene. My work is done but yours is just begining.
It's time for you to go build your scene now. Let me know when it's done and send me
If you have any questions about this article drop me a line at [email protected] or
Click here for last month's issue
Visualize a scene
The scene can be anything that you have the means to produce. There are a number of ways to find a good scene.
For example you can look through books and magazines from the period of the scene and look for something that
catches the eye. Or you can just take all your pieces lay them out on a table and look at them. Try to imagine
the different ways that they can go together. Title the scene
give the scene a working title. You don't have to, of course, but it will help you work through
the next steps if you can keep your mind focused on what the scene is going to be. Words help you
do that. For this example I have studied my pieces and decided that based on what I want to use
my scene is going to be called "The Custom Car Exhibition." Set the period
it's already done for you. But if you are using a more ambiguous village ( or creating your
own from mixed pieces) you should have a time on the calendar fixed in your mind. In my case
because of the years of the cars that are going to be in the exhibition my scene is set in
the early to mid seventies. What's that in the background?
to consider is what is going to be the background to your scene? And how can you
reproduce it? In my case my scene is going to take place in a kind of Urban setting
not really downtown but in a well developed commercial suburban area. To be precise
a gas station parking lot. What would be behind a gas station parking lot? Either
a vacant kind of overgrown somewhat woody kind of lot OR another business of some
kind. How do I reproduce that? Well that depends,
but if your space is limited than you will want to
create a backdrop. Creating a backdrop.
talent and budget. If you are of a artistic bent ( and I'll
bet you are since you are interested in creating village scenes)
you can paint the scene yourself. To make the scene more interesting
paint some of it AND paste some photographs from old magazines and
and catalogs to your background as well. This really looks more
realistic since generally paintings can't match photographs
for realism. Want it even more realistic? Get some small trees or
green ground cover from a model railroad or hobby store and glue
them to the background. 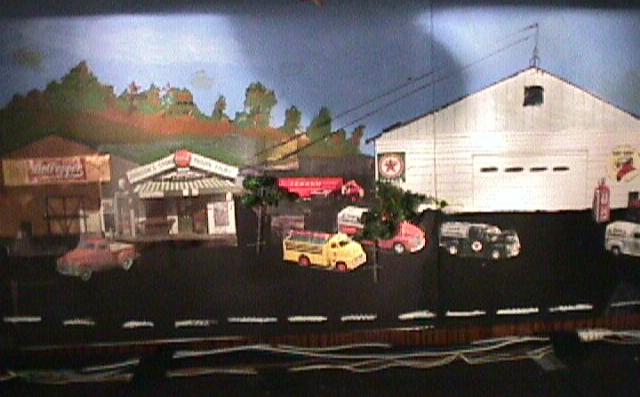
A painted background with some photo's and trees pasted on
made by painting it and then adding the other elements.
notice how they all combine to create a realistic looking
scene. This background is used for a "bed" I made in which
I insert various scenes each year usually of a
light-industrial/commercial nature. Currently it's a used car
lot. In the past it's been a gas station and a fast food joint.
the pic below shows the whole bed.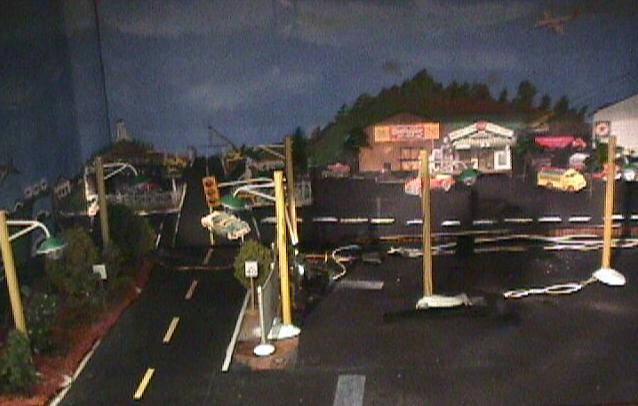
a whole new one. So we still need to produce a new background
At this point I'm going to pause to recommend a couple things.
I recommend that you get a digital camera, a good colour printer
and a really good graphic editing program. ( I have a Sony Mavica,
an Epson Photo 700 and I use Ulead System's Photoimpact 4)What
does that have to do with Villaging? You're about to see.
for the background for this new one. So I set up the
background scene and photograph it with the digital camera.
I take three photographs of three different parts of the
scene from the exact same perspective and make sure that
each scene overlaps the others slightly
Then I print out the three photographs. I took the pictures
with the camera turned sideways so that the pics will be
printed long ways. The reason for that is so that the
finished back drop will be taller. This is a great way
to produce a fast custom backdrop for a village scene.
in addition I have routed in the bulb for the building.
Create the "bed surface"
what kind of surface it is. grass, dirt asphalt etc.
in my case the surface is asphalt and that means black
art paper.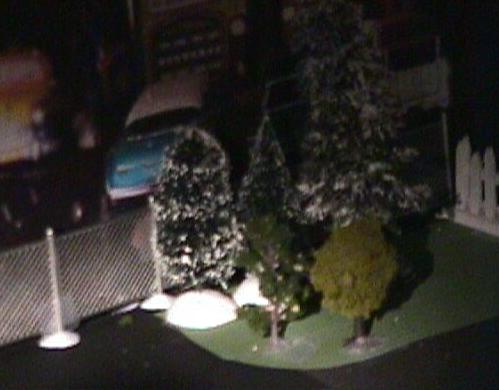
Accessorize, Accessorize, Accessorize

accessories. Begin in the back in a corner and work forward
arrange the accessories in little groups and clusters.
Fences are great for dividing the real scene from the
background. In the pic above I used two different fences
from two different companies. The chain link is from
Department 56. The Picket fence is from Lemax. Notice
how realistic the background is already becoming.
Also notice the mix of trees Department 56 and HEKI.
scene. And vary them all you can. Get them from as
many different manufacturers as you can. But DON'T
MIX electrical accessories from different companies.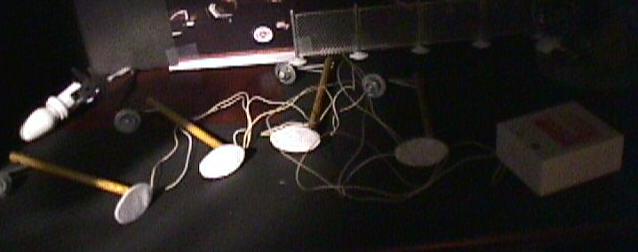
you can see the parking lot lights we are going to
use are the Department 56 Country Road Lampposts
#52663. And they have the large white battery box attached
and we need to hide that box. 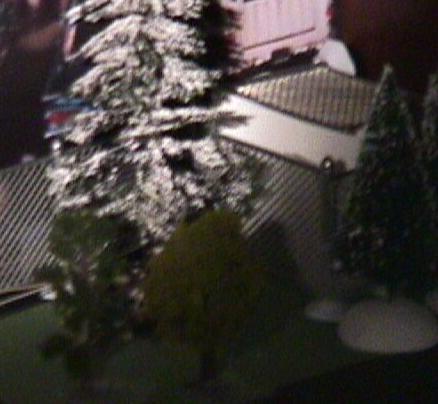
I also put an extra section of the chain link fence
on top of the box to finish hiding it. Light it Up!!
When you create a scene using a plan and proceed in a
logical order the scene practically builds itself. We
have the first two lights on the parking lot string
installed and we are about to do the last two.
The best way to do that is to figure out where we
want the lights to go and then cut through the art
paper in a straight line from the point where the wires
connect to the second light and then tuck the wires down
into the cut and then tape the cut with black electrical
tape. Don't worry about the tape real asphalt has
patched and weathered places so it should have places
that are different looking. 
been secured secure the third light with another piece of
electrical tape. Then locate a good position for
the fourth lamp and secure it with a small piece of electrical
tape. After that cover the space between with white glue
(don't make the mistake I made try not to get the glue on
the wires.) and cover the area and the wires with a piece of
black art paper as shown below. 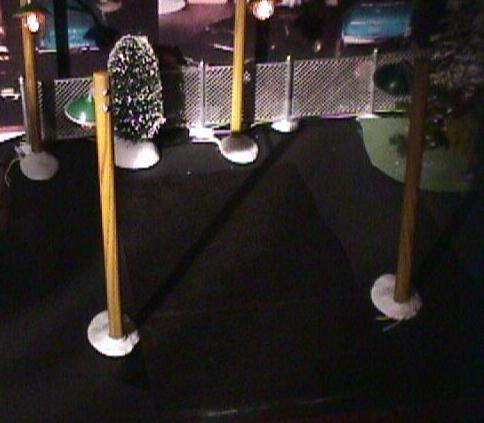
making a realistic scene is to make use of perspective and
a method that artists know very well called "layering".
Through all the Layers
scene from above. This diagram is used to help artists
arrange the parts of a drawing or painting for
maximum dramatic effect. The idea is to break the
scene into elements that are designed to catch the viewer's
interest and lead him to look at the things the artist is
showing him. These same rules should be applied to diorama
or village scene creation as well. When applied to a painting
or other two dimensional image this diagram can be tough to understand.
The way it's usualy explained is you are supposed to imagine that
the painting is standing up on end or hanging on the wall. And you
are floating up above it looking down at it. The canvas line at the
top of the diagram is the empty canvas, and the layers are contained
within the paint on that canvas.
a diagram viewed from above of our scene. The scene is three-dimensional
so everything instantly makes sense.
backdrop ( and most of them should) the backdrop is Layer 4.
Layer 4 is the "Infinity Layer" the job of this layer is to
create the illusion that the scene goes on forever out the back
of the shelf and through the wall and down the street etc.
you accomplish this by using a three-dimensional scene for the background
down a shaft that extends into infinity Layer 3 is "your end" of that shaft.
The job of the Transition Layer is to keep the things in the 1 and 2 layers
from crashing through into the Infinity Layer and destroying the infinity effect.
As I'm sure you have figured out, an artist applies Layer 4 first. It contains the
things that later, when the painting is done, will create the effect that there
is "something else back there" behind the things in the front of the painting.
In our scene that we are building Layer 3 is the Chain Link fence and the trees.
It is the "Last Layer" of real things before the phony layer of the paper backdrop.
Layer 3 doesn't have to be a fence, it can be a row of telephone poles, trees, shrubs,
a wall, or even a line of buildings. Anything that stands right before the background
and confuses the viewer as to where the background really begins. In order for
the Transition Layer to really work it should cover the bottom of the background
for the entire width of the scene.
be center stage in a village scene as well. At this point it's good to remember our second
step, "Title the Scene". Your title for the scene is what should be
happening in Layer 2.
depth. It also help's lead the viewer's eye's to the main action in Layer 2.
be. Something of interest should be going on in each zone and
they should be seperate events from the main scene. Applying Layering to our Scene
Let's continue our construction
around so they are facing backwards. This is a realistic arrangement but it also
serves two important functions. One is it casts light directly and squarely into
Layer 2 ( The main event) while at the same time acting as part of Layer 1
(The Foreground) a viewer has to look past the poles to see into the scene thereby
heightening the three dimensional effect and the realism. 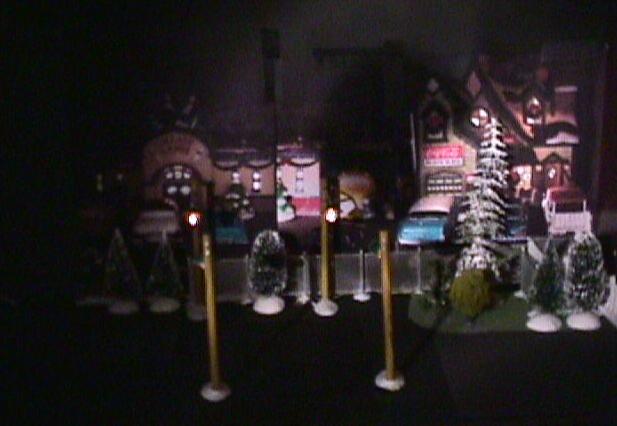
The finished bed.
Notice how realistic the background looks. Adding the Building
Ok it's time to put in the building. The building I am going to use for this scene
is "The Holly Brother's Garage" by Department 56. 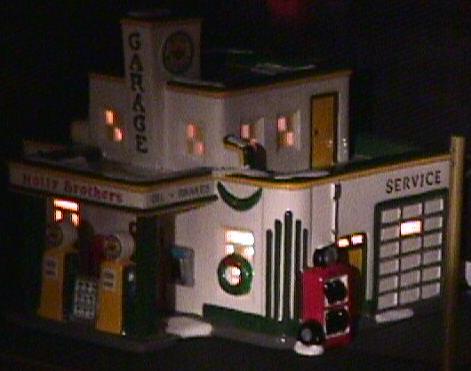
Adding the Vehicles
Now for the cars. Since the scene is called "The Custom Car Show"
it's obivous that some but not all the cars are going to occupy Layer 2.
Now it's usually at this point that most scene builders consider themselves done.
They put in the cars and the people and walk away figuring they finished.
But the truth is that the cars and people should be added with the same amount of
care as all the other elements. Let's begin by filling in Event Zone 3 of Layer 2.
Now you recall that each Layer is seperated into three "Event Zones",
as the name implies each of these zones represents a center of action.
In other words something should be going on somewhere in each of the three zones
and the most interesting things should be going on in Zone 1 and 2 leaving the
less interesting event for Zone 3. That means that we need to have some idea of
what the events are going to be.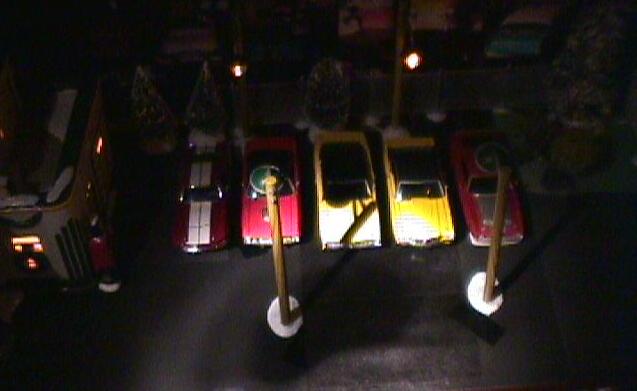
more clearly. You can see how the placement of the items in the scene
lines up with the diagram. Ok so we have our cars parked in Layer 2 Zone 3
That means "Yes this is main event, it's what the scene is all about but
it's where the least action is. The cars on display are the subject but
not the center of attention.
we have to know what we have to make that action with. At this point
an inventory of what we have left to go into the scene would be in order.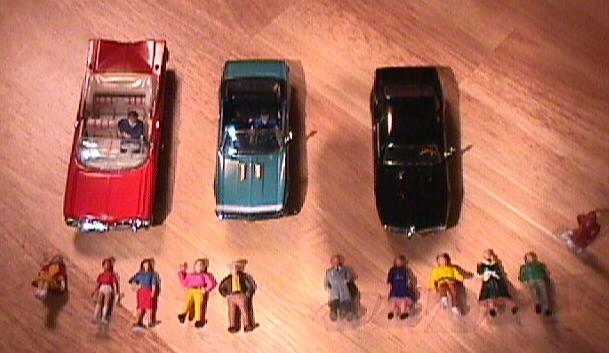
Buy the People ...for the people.
After choosing the five cars that are going to be on display I have three
cars left that I want to use in the scene and I have a total of 13 people
I have selected to use in the scene. They are from three different manufacturers
(Life-Like Model Railroad, Model Power, and Omen). I have already put two of
them into the convertibles as drivers. After doing that the next thing I noticed
was the girl in the skirt sitting down ( all the way to the left). Right away I knew
what she had to be doing. Attracting attention to the Action
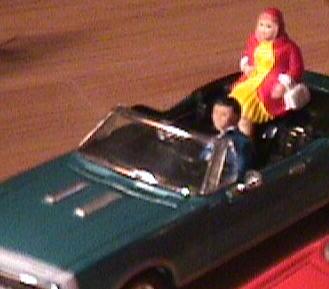
in so that she could wave to people she knew.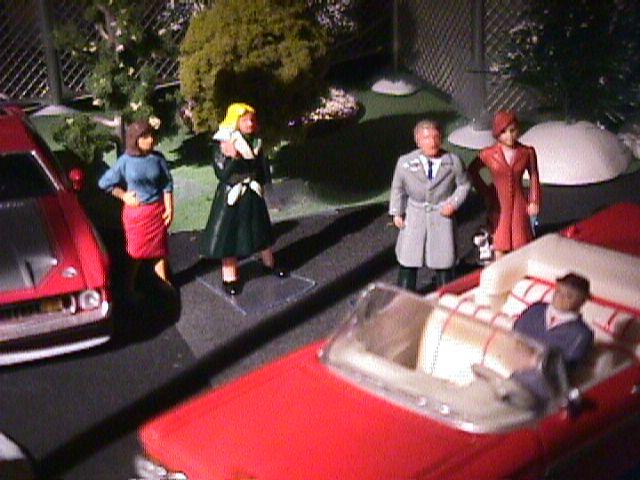
thing in this scene is part of the whole scene yet they are also a scene unto
themselves. The two girls were talking and the man with the gray coat and the
lady in the Brown coat were walking along. When they were all interupted by the
man driving the 59 Impala into the lot. Notice how by choosing the right figures
and placing them in the proper manner you can instantly see where their attention
is focused. Notice how you want to look there too. That's the whole point.
the girl in the red skirt owns the Mustang she's standing next to. 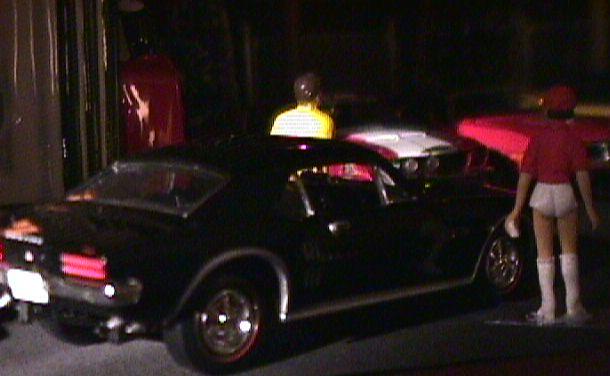
into the lot and the way the car is parked all suggest "just arrived". This illustrates
yet again the importance of proper placement of the people and vehicles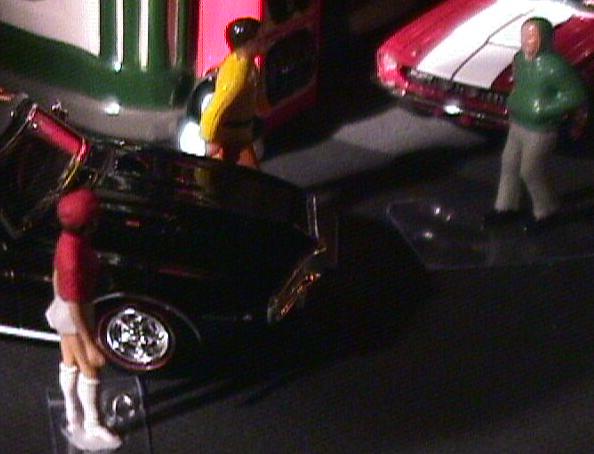
looking for someone who can tell him where he should park. The man in the green
jacket is coming over to help him.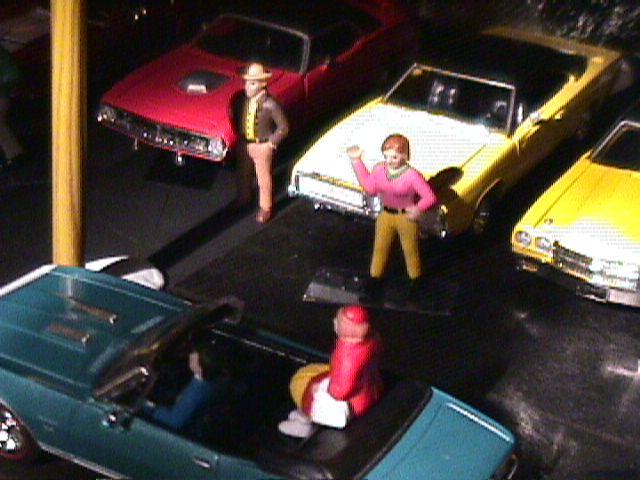
up on back. The girl in pink must know her or her boyfriend because she's waving
(from Layer 2). Also in layer 2 the man in the hat and brown jacket is standing
expectantly. He most likely owns one those cars ( probably the red Barracuda) and
is waiting for someone to admire it and tell him how great a car it is. That's why
he came out today after all. The Whole Scene
(I hear what you are saying.. "haven't you forgotten something? ...
what about the incidental light?" No I haven't forgotten that. In order
to do incidental lighting we must first have a discussion of low voltage
wiring and electrics ..and that we will do next issue)
some pix. I'll feature it on The Village Idiot. So go get to work, remember what you
learned. Have fun and ... KEEP ON VILLAGING!! ![]()
just press here. Webmaster 


 © 2000